Looking to jumpstart your PastureMap trial, or learn some quick tips to become a PastureMap pro? Check out this 5 step guide to importing animal records from an Excel spreadsheet.
PastureMap can import your existing animal records from a spreadsheet, including animal weights, IDs, birthdates, calving dates, animal types, and sire and dam IDs. You can then track the weights and grazing records of these animals over time in PastureMap.
Your animals will be imported into a new herd. If you want to add animals to an existing herd, you can import animals into a new herd and then move all the animals from that herd into your existing herd.
1. Start importing animals into a new herd, click on "Herds" at the top and then select the green "Add Herd" button located in the top right of the screen.
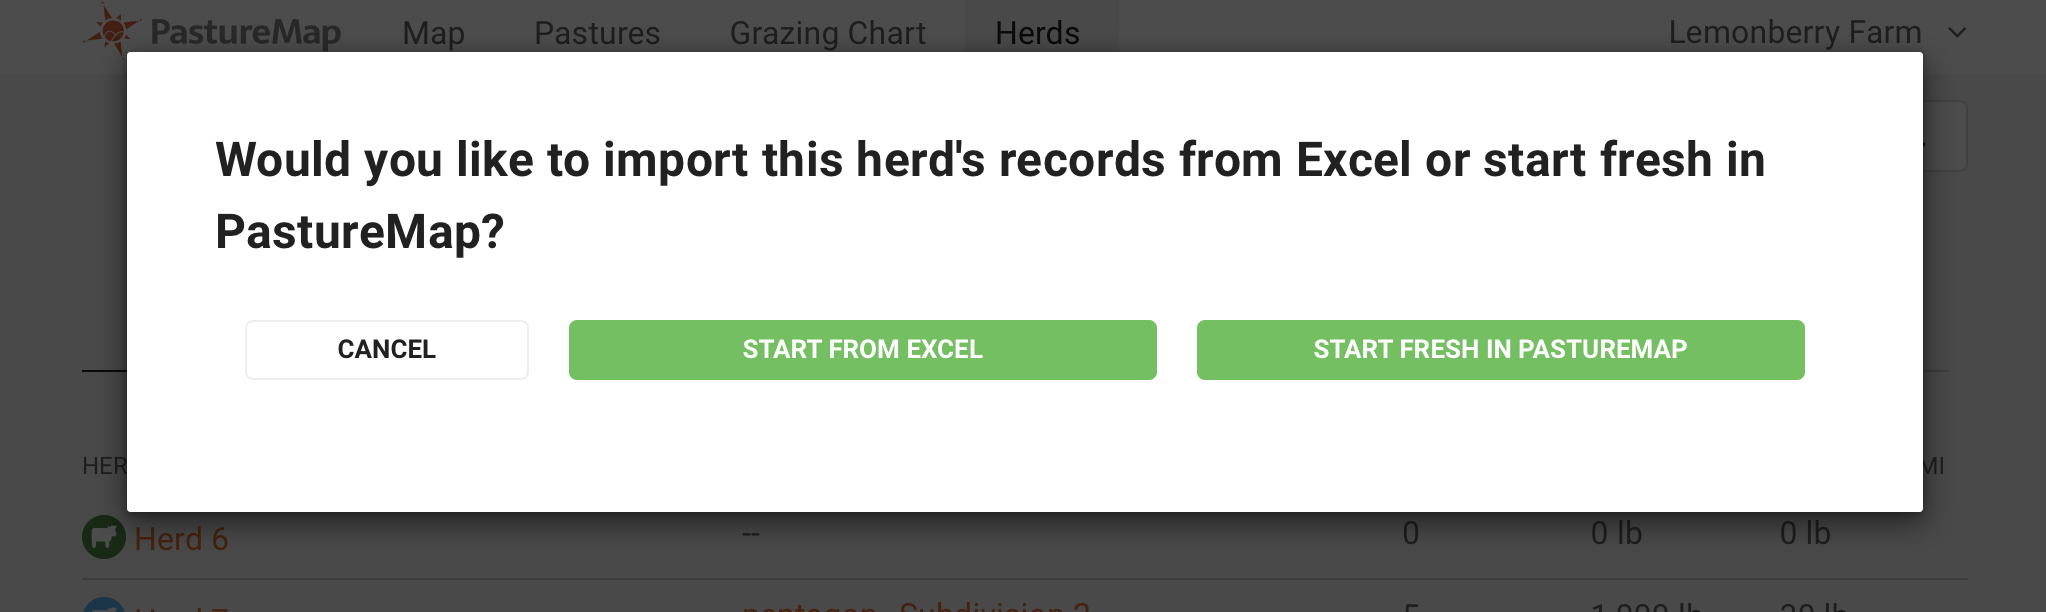
2. Import your existing records by clicking on "Start from Excel".
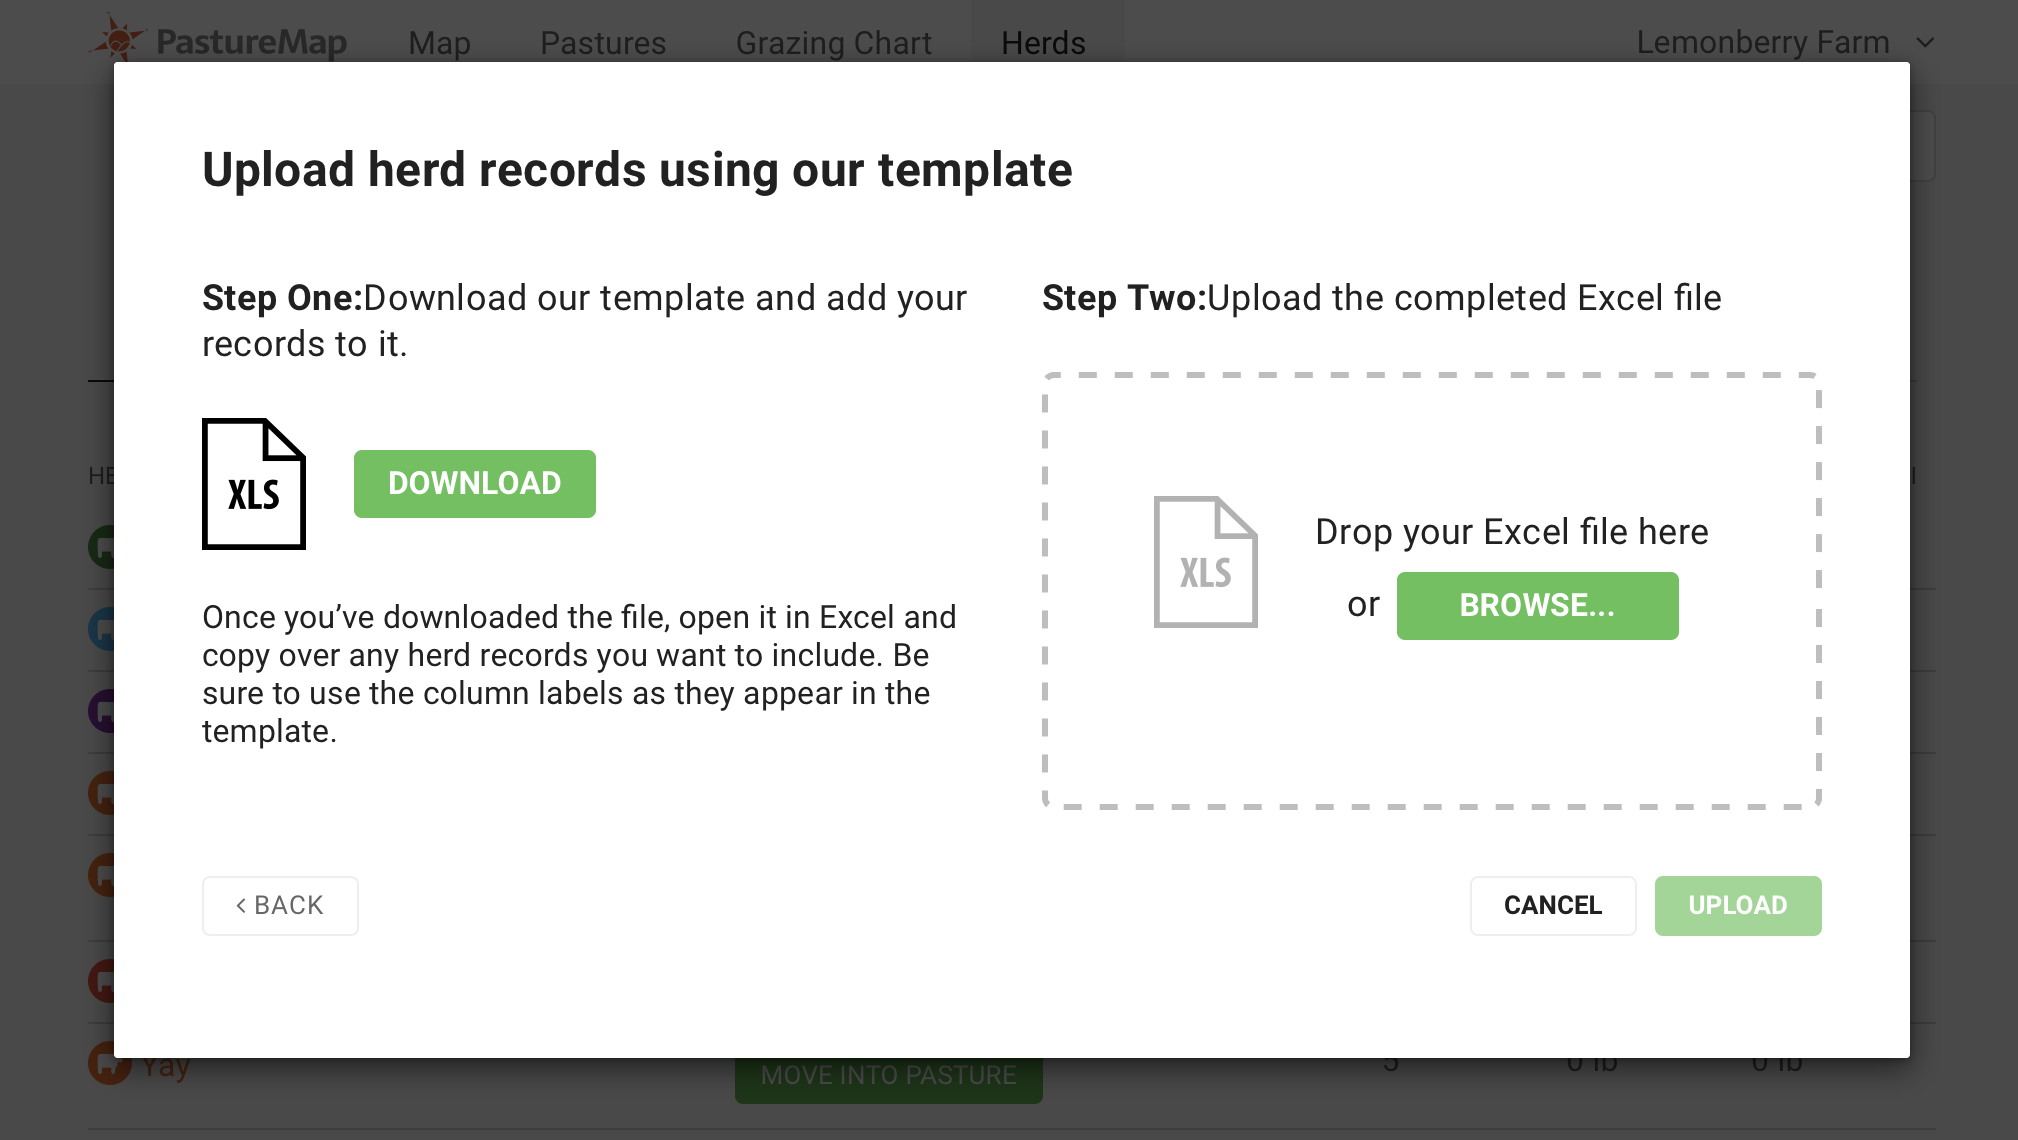
3. Click "Download" to get our Excel template. If you're having trouble downloading, make sure your ad blockers are turned off.
4. Open the template in Excel. Copy over any herd records you want to upload.
Be sure to use the column labels as they appear in the template. Fill in the Animal IDs and other fields in the template with the information you want to import. You can copy and paste information from an existing spreadsheet. If you are using other livestock management software, export your animal records and copy them into the spreadsheet.
PastureMap can import the following data fields for each animal. All of these are optional except for the Animal Name or Ear Tag:
- Animal Name or Ear Tag
- First day on pasture (may also be purchase date)
- Weight
- Last Weight Date
- Birthdate
- Animal Type
- Sex
- Last Calving Date
- Sire Ear Tag
- Dam Ear Tag
Make sure that the "First Day on Pasture" is before the earliest grazing record you want to add for this herd.
Enter approximate weights for your animals if you don't have exact weights. This will help us more accurately calculate your pasture productivity.
5. Save the template. Upload it by dragging into the dotted rectangle or select "Browse." Hit "Upload" once completed.
Once your upload is completed PastureMap will display the following screen in order to verify the information, this is how your records will show up in PastureMap.
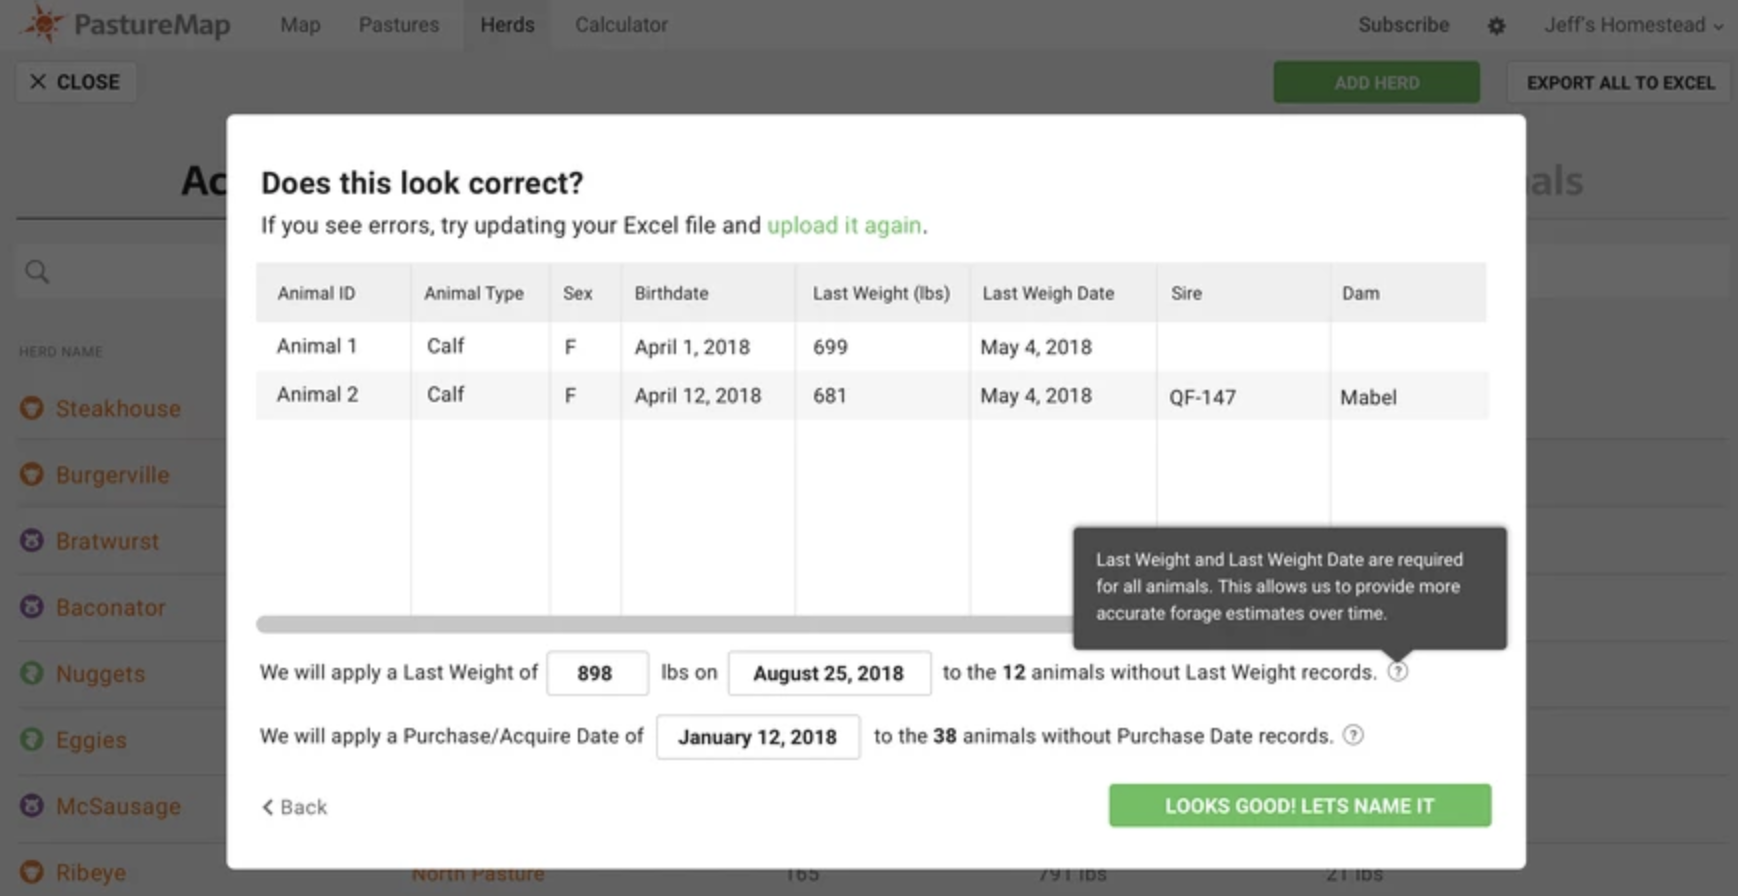
If something doesn't look right, you can select "upload it again" highlighted in green to make changes to the excel file and re-upload. Select "Looks Good! Let's Name It" when you're ready to move on.
You then will name the herd and select and icon and color for display. Provide ADG and Estimated DMI for calculations and select "Finished" once completed.
Now that your information is captured in PastureMap you can start adding grazing records.
Check out what else PastureMap can help you accomplish, start your free trial today, and learn how we make grazing management simple.